Top 6 Interesting SEO Project Ideas & Topics

In the ever-evolving digital landscape, mastering the art of Search Engine Optimization (SEO) has become crucial for businesses and individuals looking to establish a strong online presence. As search engines refine their algorithms and user behaviors shift, innovative SEO strategies are essential to staying ahead of the curve. If you’re looking for captivating SEO project ideas that explore the realm of search engine optimization, you’re in the right place. Let’s dive into the top six intriguing SEO project ideas and topics that will help you sharpen your SEO skills and make an impact in the digital world.

1. Voice Search Optimization: Redefining SEO for Conversational Queries

With the rise of voice assistants and smart devices, optimizing for voice search is a cutting-edge project idea. Explore the nuances of how people phrase voice queries and adjust SEO strategies to accommodate natural language patterns. Dive into long-tail keywords, structured data, and schema markup to ensure your content is voice-search-friendly.

2. Video SEO: Unlocking the Potential of Visual Content

In an era of video content dominance, mastering video SEO can set you apart. Research and experiment with techniques to optimize videos for search engines. This includes crafting compelling video titles, descriptions, and tags, as well as leveraging platforms like YouTube to enhance your content’s discoverability.

3. Local SEO for Brick-and-Mortar Success

Local businesses heavily rely on local SEO to attract nearby customers. Create a project focused on enhancing local search visibility. Explore techniques like Google My Business optimization, local citation building, and location-specific keyword targeting. Your project could offer a comprehensive guide for small businesses seeking to improve their local online presence.

4. Mobile-First SEO: Navigating the Mobile-Friendly Algorithm Era

Mobile devices are the primary gateway to the digital world for many users. Investigate mobile-first indexing and design strategies to ensure websites are responsive and optimized for mobile devices. Dive into Accelerated Mobile Pages (AMP), responsive design, and mobile site speed optimization to provide a comprehensive guide for mobile SEO success.

5. E-commerce SEO: Maximizing Online Store Visibility

E-commerce platforms thrive on effective SEO practices. Develop a project centered around optimizing e-commerce websites for search engines. Explore strategies such as product schema markup, optimizing product images, writing persuasive product descriptions, and creating a clear site structure to improve user experience and search engine visibility.

6. Technical SEO Auditing: Enhancing Website Performance Behind the Scenes

Underneath the surface of a website lies a complex web of technical elements that can impact search rankings. Craft a project that delves into technical SEO auditing, covering aspects like website speed optimization, indexability, crawlability, and fixing broken links. This project could serve as a comprehensive resource for web developers and SEO professionals striving to create technically sound websites.

In conclusion, the world of search engine optimization is vast and ever-changing, providing ample opportunities for captivating projects. These six project ideas span various facets of SEO, from emerging trends like voice search and mobile optimization to tried-and-true techniques like local SEO and technical auditing. Whichever project you choose, remember that staying curious, keeping up with industry trends, and experimenting with new strategies are essential for success in the dynamic field of SEO. So, embark on your SEO journey, armed with these exciting project ideas, and make your mark in the realm of search engine optimization. Here are the tips for 2023 SEO journey.

Crystal Clear Choices: Finding the Perfect Shower Screen for Your Bathroom

When it comes to designing and enhancing your bathroom space, one often overlooked yet crucial element is the shower screen. Not only does it play a functional role in preventing water from splashing onto your bathroom floor, but it also contributes significantly to the aesthetics of the space. Among the various options available, frameless shower screens have gained immense popularity due to their sleek and modern appearance. In this guide, we will explore the world of frameless shower screen sizes and help you discover the ideal fit for your bathroom.

Frameless Shower Screen Sizes: A World of Possibilities

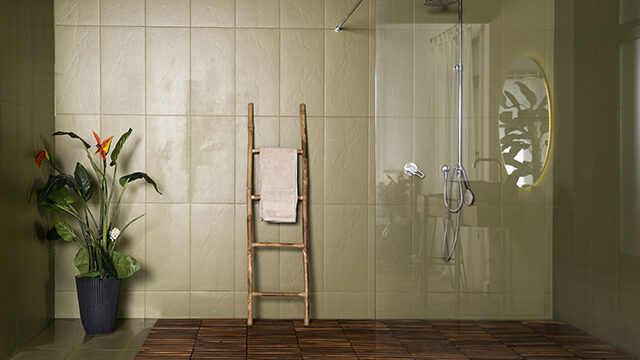
Frameless shower screens are known for their elegant and minimalist design, allowing your bathroom to exude an open and spacious feel. The absence of bulky frames offers a seamless and uninterrupted view, creating a sense of luxury and sophistication. But with this elegance comes the need for precision when selecting the right size for your bathroom.

These shower screens are available in a range of sizes to accommodate various bathroom dimensions and layouts. From compact en-suites to expansive master bathrooms, there’s a frameless shower screen size that’s perfect for your space.

Standard Frameless Shower Screen Sizes

While customization is possible, understanding the standard frameless shower screen sizes can provide a helpful starting point. These standard sizes are designed to fit most bathrooms comfortably and offer an appealing visual balance. Here are some common frameless shower screen sizes:

  1. 900mm x 900mm: This square option is great for smaller bathrooms or corner shower spaces. It provides a cozy yet stylish shower enclosure.
  2. 1000mm x 800mm: A slightly elongated shape, this size is suitable for bathrooms with limited space and offers a more spacious feel than the square option.
  3. 1200mm x 800mm: Ideal for medium-sized bathrooms, this size provides a comfortable showering area without overwhelming the space.
  4. 1500mm x 900mm: If you have a larger bathroom, this size offers a generous showering space while maintaining a sleek look.
  5. 1800mm x 1000mm: The largest standard size, this option is perfect for spacious bathrooms and creates a luxurious and open atmosphere.

Customization: Tailoring the Size to Your Bathroom

It’s important to note that while standard sizes are a great starting point, every bathroom is unique. Factors such as the layout, available space, and your personal preferences will play a significant role in determining the ideal frameless shower screen size for your bathroom. Fortunately, many manufacturers and suppliers offer customization options, allowing you to create a shower screen that fits your space perfectly.

Making the Choice: Factors to Consider

When selecting the right frameless shower screen size, consider the following factors:

  1. Bathroom Size: The size of your bathroom will dictate the available options. Larger bathrooms can accommodate bigger shower screens, while smaller bathrooms may require more compact sizes.
  2. Layout: The layout of your bathroom, including the position of existing fixtures like sinks and toilets, will influence where the shower screen can be installed.
  3. Aesthetic: Consider the overall aesthetic you want to achieve. A larger shower screen can create a luxurious, open feel, while a smaller one might provide a cozier atmosphere.
  4. Functionality: Think about how you use your shower. If you prefer ample space to move around, a larger screen might be preferable.
  5. Budget: Customization can come with added costs, so factor your budget into your decision-making process.

In conclusion, selecting the right frameless shower screen size involves careful consideration of your bathroom’s dimensions, layout, and your own preferences. Whether you opt for a standard size or decide to customize, a frameless shower screen can transform your bathroom into a stunning and functional space, elevating both its visual appeal and your daily showering experience. So go ahead and explore the crystal-clear choices available, and find the perfect frameless shower screen that complements your bathroom’s uniqueness. Trust the Sydney glass for perfect choice in your bathroom glass.

Beginner’s Guide to Operating a Buffer Polisher

Introduction: A buffer polisher is a versatile tool used in various industries, including automotive detailing, woodworking, and metalworking. It is designed to restore the shine and luster of surfaces by removing imperfections, scratches, and swirl marks. If you’re a beginner looking to learn how to operate a buffer polisher effectively and safely, this guide is here to help. By following these steps and best practices, you’ll be well on your way to achieving professional-grade results.

Step 1: Familiarize Yourself with the Equipment

Before operating a buffer polisher, it’s important to understand its components. A typical buffer polisher consists of a motor, a handle or grip, an on/off switch, and a rotating pad or disc. Take the time to read the user manual provided by the manufacturer, which will outline specific details and safety precautions unique to your polisher model.

Step 2: Gather the Necessary Supplies

Ensure you have all the necessary supplies before you begin. These typically include a buffer polisher, appropriate polishing pads, polishing compounds, a clean microfiber cloth, and any personal protective equipment (PPE) required, such as safety goggles and gloves.

Step 3: Prepare the Work Area

Choose a well-ventilated and well-lit area for your polishing work. Clear the space of any obstacles, debris, or loose objects that could interfere with the polishing process. Cover nearby surfaces or objects that you want to protect from polishing compound splatter.

Step 4: Preparing the Surface

Thoroughly clean the surface you intend to polish to remove dirt, dust, and grime. Use a mild detergent or dedicated surface cleaner, followed by a rinse and drying step. Make sure the surface is completely dry before proceeding.

Step 5: Selecting the Right Polishing Pad and Compound

Different surfaces and imperfections require different types of polishing pads and compounds. Consult the manufacturer’s recommendations or seek advice from experienced users or professionals to determine the appropriate combination for your specific application.

Step 6: Applying the Polishing Compound

Apply a small amount of polishing compound to the surface or directly onto the polishing pad. Spread the compound evenly across the working area to ensure consistent coverage. Be cautious not to use too much compound, as it may splatter during operation.

Step 7: Operating the Buffer Polisher

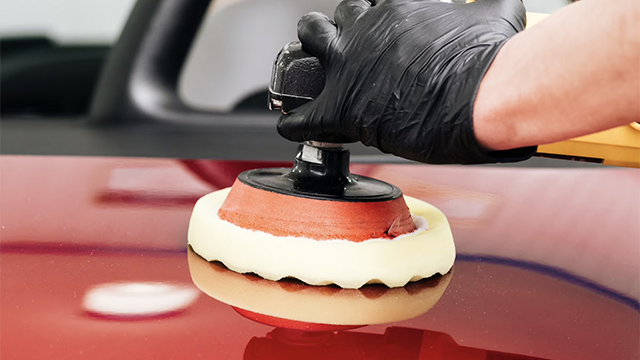
Hold the buffer polisher firmly using both hands, ensuring a comfortable and secure grip. Switch on the buffer polisher and gradually increase the speed to the desired level, following the manufacturer’s instructions. Begin polishing by applying light pressure and moving the buffer polisher in smooth, overlapping passes.

Step 8: Maintaining Proper Technique

Maintain a consistent speed and avoid excessive pressure, as this can lead to uneven results or damage the surface. Keep the buffer polisher moving at all times to prevent heat buildup and burn marks. Pay attention to the condition of the pad and compound, and reapply as needed.

Step 9: Finishing the Polishing Process

Once you have achieved the desired results, switch off the buffer polisher and allow the pad to come to a complete stop before setting it down. Wipe away any excess compound using a clean microfiber cloth, and inspect the surface for any remaining imperfections.

Step 10: Clean Up and Maintenance

Clean the polishing pads thoroughly after each use to remove any compound residue. Follow the manufacturer’s instructions for pad maintenance and storage. Clean the buffer polisher, ensuring it is unplugged, and store it in a safe and dry place.

Conclusion: Operating a buffer polisher may seem daunting at first, but with proper knowledge and practice, you can achieve excellent results. Remember to prioritize safety, choose the right supplies, and follow the manufacturer’s instructions. By mastering the techniques outlined in this beginner’s guide, you’ll be well on your way to transforming dull surfaces into stunning ones with the help of a buffer polisher. Happy polishing! Check out our website for special deals.